Preppy Nails: The Ultimate Guide to Effortlessly Chic Manicures

Preppy nails are more than just a trend—they’re a lifestyle. Rooted in classic elegance with a playful twist, this manicure style channels the timeless charm of Ivy League fashion, coastal getaways, and polished sophistication. Think crisp lines, pastel hues, and patterns that feel both nostalgic and fresh. Whether you’re heading to a summer regatta, a brunch with friends, or simply want to add a touch of refinement to your everyday look, preppy nails offer endless possibilities. In this guide, we’ll dive into the origins of this iconic style, break down its key elements, and teach you how to master the art of preppy manicures at home.
What Are Preppy Nails?
Preppy nails are a celebration of clean, polished aesthetics inspired by traditional East Coast prep culture. This style embraces simplicity with a focus on symmetry, muted tones, and geometric patterns. Unlike bold, avant-garde nail art, preppy designs prioritize subtlety and versatility. Picture soft pinks, nautical stripes, or delicate argyle prints—details that feel effortlessly put together.
The magic of preppy nails lies in their adaptability. They’re equally at home on a college campus as they are at a garden party. The look often incorporates elements like French tips, monogram accents, or minimalist florals, all executed with precision. It’s less about flashy embellishments and more about creating a cohesive, understated statement.
The Origins of Preppy Nail Style

To understand preppy nails, we need to revisit the fashion movement that inspired them. The term “preppy” emerged from the Ivy League universities of the 1950s and 1960s, where students embraced tailored blazers, loafers, and pearl necklaces. This sartorial sensibility trickled into beauty trends, with manicures becoming a subtle yet essential part of the polished look.
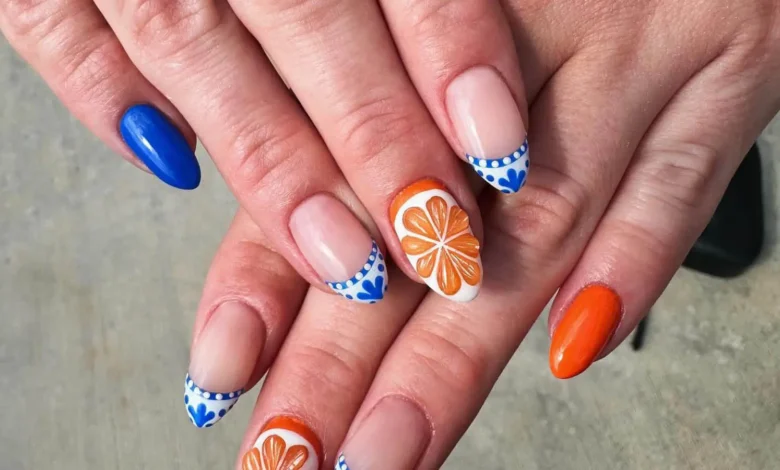
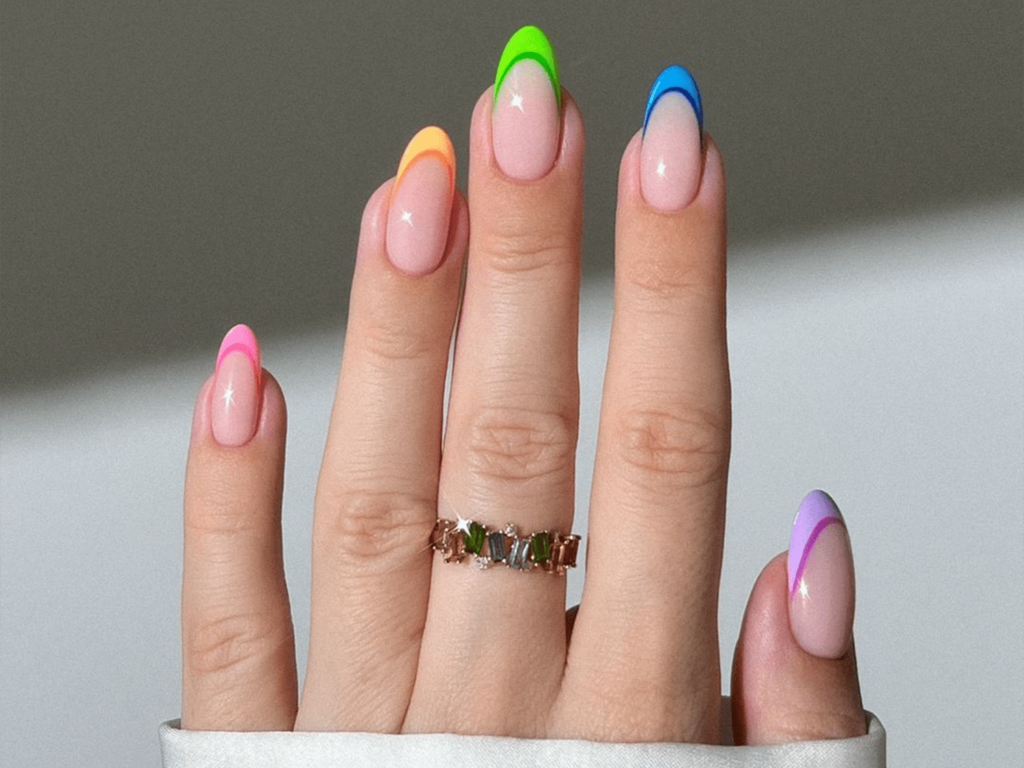
In the 1980s, brands like Lilly Pulitzer and Ralph Lauren popularized preppy prints in vibrant colors, which soon influenced nail art. The French manicure, a staple of preppy style, gained mainstream fame during this era. Today, the aesthetic has evolved to include modern twists—think neon accents or mismatched patterns—while staying true to its roots in refinement.
Essential Elements of Preppy Nails
Preppy nails thrive on soft, versatile shades. Creamy whites, baby blues, ballet pinks, and mint greens are classics. These colors evoke a sense of calm and pair well with everything from linen dresses to blazers. For contrast, navy or burgundy adds depth without overpowering the design.
Patterns and Details
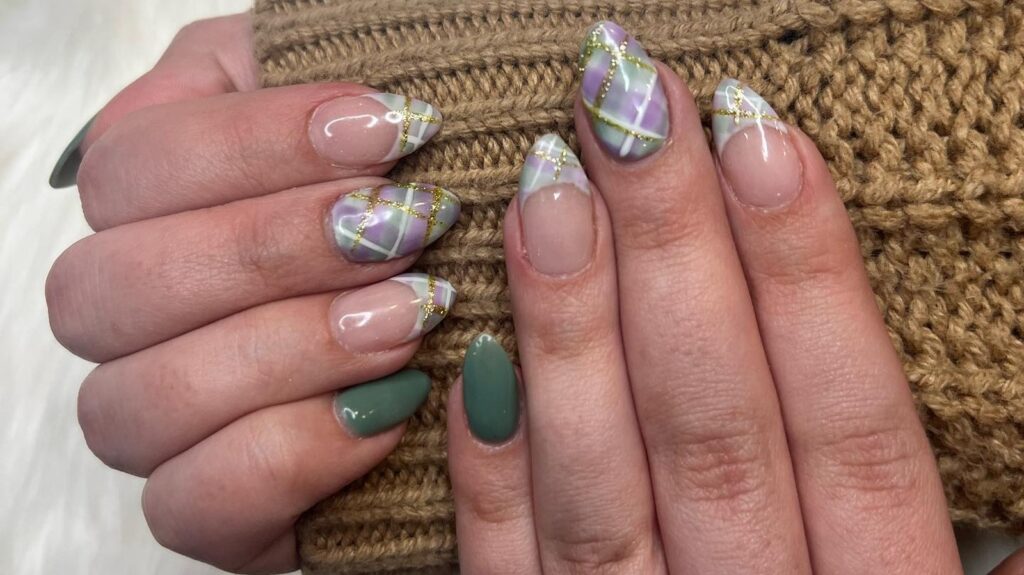
Stripes, polka dots, and argyle are hallmarks of preppy nail art. These patterns are often kept small and precise to maintain elegance. Negative space designs, like a single stripe on a nude base, keep the look fresh and modern.
Nail Shape
The shape of your nails matters. Almond, oval, or square nails with rounded edges complement preppy designs best. Avoid overly long or sharp styles, which can clash with the aesthetic’s clean lines.
Popular Preppy Nail Designs
A timeless favorite, the French manicure features a natural base with white tips. Modern versions swap white for metallics or pastels, offering a playful update.
Nautical Stripes
Channel coastal vibes with navy and white stripes. Add a gold anchor decal or a red accent nail for a whimsical touch.
Pastel Checks
Argyle or gingham patterns in soft lavender or lemon yellow feel both retro and trendy. Pair with a glossy topcoat for a polished finish.
How to Achieve the Perfect Preppy Manicure at Home

- Prep Your Nails
Start with clean, buffed nails. Push back cuticles and trim nails to your desired shape. A smooth base ensures your polish adheres better. - Apply Base Coat
A quality base coat prevents staining and extends wear time. Let it dry completely. - Paint with Precision
Use thin layers of polish to avoid streaks. For patterns, opt for nail striping tape or a fine brush. Let each layer dry before adding details. - Seal with Top Coat
Finish with a high-shine top coat to protect your design and add longevity.
Maintaining Your Preppy Nails
Preppy nails require minimal upkeep if done right. Reapply top coat every 2–3 days to prevent chipping. Keep cuticles moisturized with oil, and avoid using nails as tools to maintain their shape.
Preppy Nails for Different Occasions
Stick to neutral tones or sheer pinks for a low-key look. A single accent nail with a tiny heart or star adds personality.
Weddings or Formal Events
Opt for pearlized finishes or lace-inspired designs. Soft gold accents elevate the elegance.
Holidays
Incorporate seasonal colors—cranberry red for Christmas or pastel eggs for Easter—while keeping patterns subtle.
The Best Products for Preppy Nails
- Essie (“Ballet Slippers” for the perfect pale pink)
- OPI (“Bubble Bath” for a sheer nude)
- Sally Hansen Striping Tape for crisp lines
- Seche Vite Top Coat for glass-like shine
Common Mistakes to Avoid
- Overcomplicating Designs
Stick to one or two patterns per manicure. Too many elements can look cluttered. - Skipping Base Coat
This step prevents staining and helps polish last longer.
Preppy Nails and Nail Health
While preppy nails prioritize aesthetics, nail health is key. Avoid over-filing, and give nails a break from polish occasionally. Use strengthening treatments if nails feel brittle.
FAQs
Q: Can preppy nails work on short nails?
A: Absolutely! Short, well-shaped nails look chic with minimalist designs like stripes or dots.
Q: Are preppy nails expensive to maintain?
A: Not at all. With the right tools, you can DIY most designs at home.
Q: Can I mix different preppy patterns?
A: Yes—just keep colors cohesive. Pair polka dots with stripes in the same hue family.
Q: How do I fix a chipped preppy manicure?
A: Touch up the chip with polish, then apply a fresh layer of top coat.
Q: Are gel polishes good for preppy nails?
A: Yes! Gel offers long-lasting wear, ideal for intricate designs.

